Thursday, March 29, 2018

Cards For April

 For my April cards, I chose the Perennial Birthday set that is found in the Occasions Catalog.  This would be a perfect set for someone who is new to stamping because it contains both birthday greetings and floral stamps.  

This is what I came up with for a "guy version" of this card:
(Notice that I used the "rose" stamp to make balloons.)

I used the same design for both cards.  Just a rectangle with the greeting on a banner.  This would work with just about any stamp set!  Also, the rectangle could be just a piece of patterned paper.  I lifted the rectangle up using dimensional dots and I used my Banner Triple punch for the banner. 

SIMPLE STAMPING TIP #34:  For a quick card design, pair up a rectangle with a banner.

Here is a look at all of the stamps in the Perennial Birthday set:
Image result for perennial birthday stamp set stampin up
If you need any stamping supplies or have any questions, email me at godismydelight@yahoo.com.

Thursday, March 22, 2018

Inspired By Book Covers


I recently bought a couple of books to give to my youngest grandson, Tristan, who will be turning 1 year old in a few weeks.  Each of these books feature black & white artwork, with only one accent color.  I love these bold, bright images and felt inspired to come up with a way to re-create that look on a card.  This is what I came up with:

(Note:  This is not the card I will be sending Tristan!  I just wanted to re-create the style.)

Here is the other book that Tristan will be getting.  


And here's the card that I made:

These cards were easy to make using the Petal Passion designer series paper (that I've also shown here, here, here, and here).  It is so easy to work with black & white paper, and I consider it a "staple item" in my crafting supplies.  

Here is a look at all of the papers that make up the collection:
Image result for stampin up petal passion dsp

For the colored elements on these cards, I found that die-cut images had the solid look that I needed to stand out on these cards.

SIMPLE STAMPING TIP #33 - Find inspiration in the objects around you.  Find ways of re-creating the style on a card!


If you need any supplies or have questions, I would be happy to help you!

Thursday, March 15, 2018

Easter Candy Crate


Today I am sharing an idea to use with the Wood Crate Framelits.  I have made these cute little crates for several other holidays & occasions over the past several months.  These are the perfect size to use as party favors or as just a little something fun to give away.

SIMPLE STAMPING TIP #32 - Use your stamping supplies to create fun holiday decor.

There are many ways of decorating & dressing up these little crates.  For Easter, it seemed natural to make a nest of shredded paper grass and add a handful of chocolate eggs.  

I added some embellishments that I made using the Hello Easter stamp set, from the Occasions Catalog.
  
Image result for hello easter stampin up

The circle with the bunny is taped onto a lollipop stick.

The "Hello Spring" fits perfectly on the Duet Banner punch.
Image result for stampin up duet banner punch

Easter is such a festive time of year and it's nice to have little ways like this of adding color (and chocolate) into your celebration!


Thursday, March 8, 2018

Hello Spring & Happy Easter Cards


As I am writing this, there is a fresh layer of snow on the ground here in Michigan.  But I find it encouraging to know that spring is on it's way!  

A few days ago, I sat down at my craft table with the Hello Easter stamp set, which is in Stampin' Up's  Occasions catalog.  These are the designs that I came up with . . . 


I personally think that this is one of the cutest cards I've ever created!  I love everything about it . . . the wood background, the lace doily, the brown bunny with a tiny bow, the soft blue card base, and the little bit of green. 


I made this card using the exact design as the first card, minus the paper doily.  Somehow it has a slightly dressier look, even without the lace.  I thought that this paper from the Delightful Daisy collection had a nice springtime feel to it.  

In the two cards above, I used this tip:

SIMPLE STAMPING TIP #31 --- Tie a length of solid baker's twine around the neck of a stamped or punched animal.


See there . . . that little bow adds such a charming touch!  And solid baker's twine is perfect for making teeny, tiny bows.  It is available from Stampin' Up in 5 different colors.  One spool of 25 yards is $3.00.  A very inexpensive way to dress up any card! 


Here are a couple of other cards I made: 


I love chocolate eggs at Easter, don't you?!  I chose brighter colors for the flowers on this card.


  This green background paper is also from the Delightful Daisy collection.  I really like the purple & green color combination.  Purple is not a color that I use very often, but for some reason I associate purple with Easter.  Maybe because of this classic book from my childhood . . .

Image result for the golden egg book


Here is a look at all of the stamps from the Hello Easter set:
 Image result for hello easter stampin up

I like that this set is not limited to just Easter; with the flowers, the bunny, and the "Hello Spring", it can be used throughout the spring season.

I hope this has brought a little touch of spring into your day, regardless of the weather where you live.  And remember  that Daylight Savings Time begins this weekend . . . spring forward!


Thursday, March 1, 2018

Oregon Scrapbook Pages


Pete & I recently returned from a trip out to Oregon, where we visited our son and his family.  Sometimes we think it would be nice if we lived closer to each other, but one good thing about it is that it gives us an opportunity to spend time in such a BEAUTIFUL PLACE!  

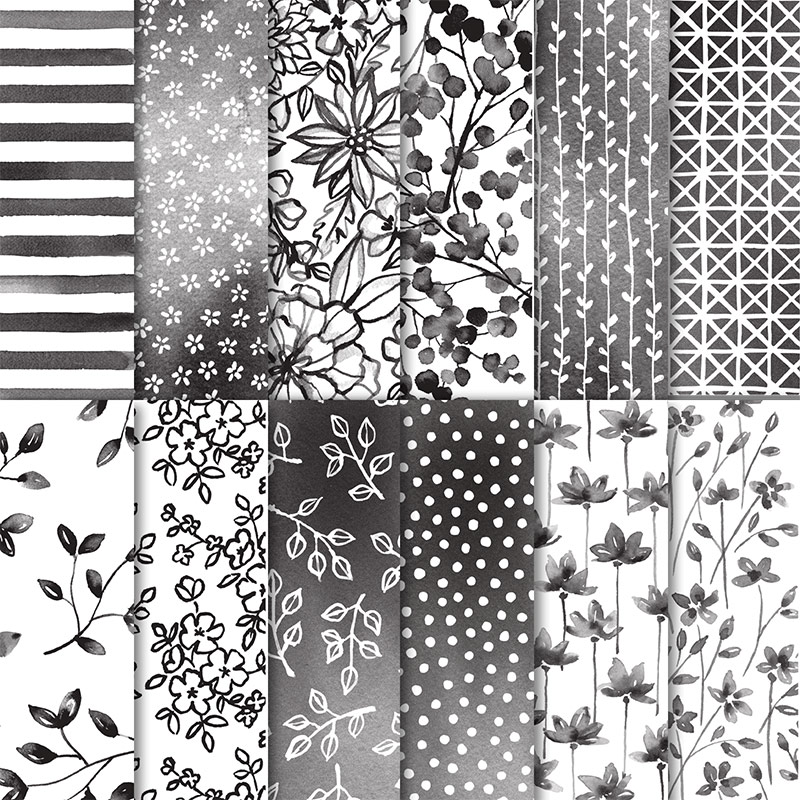
Being surrounded by both gorgeous scenery and grandchildren, we naturally took lots of photos!  Near the end of our visit, I was browsing through the photos we had taken & started planning my scrapbook pages.  I realized that the Naturally Eclectic paper from Stampin' Up would look great with my photos.  
Image result for naturally eclectic designer series paper
I knew the blue & green would go nicely with the beach & aquarium photos.  And the pinkish purple would match a lot of my grandaughters' clothes!   And besides, all of the sheets have sort of a water-colored look to them, which goes perfectly with the typical rainy weather of the Pacific Northwest.

However, this was paper that I did not have, so I went ahead and ordered it online.  It arrived on my doorstep a couple of days after we got home, and by then I had printed my photos.  I was all set to create some pages!


The pages came together pretty quickly.  I used several tips that I have shared here before in previous blog-posts:  


SIMPLE STAMPING TIP #3 - Look for elements (colors, accents, patterns, etc) in your photos that you can repeat on your page.

SIMPLE STAMPING TIP #7 - Stamp directly onto patterned paper.


SIMPLE STAMPING TIP #10 - Print some of your photos as "wallet sizes" in order to fit more photos on a page.


SIMPLE STAMPING TIP #15 - Cut images out of patterned paper to use as embellishments.


SIMPLE STAMPING TIP # 28 - Invest in a set of heart rubber stamps to use on a variety of cards & other projects.


Image result for heart happiness stampin up
Heart Happiness stamp set, Occasions Catalog, p 20

So, this latest trip is literally "in the books"!  It is so nice to be able to look at these pages; not only to remember what a great time we had, but also to reflect on the blessings of family and the beauty of God's creation.