Thursday, December 28, 2017

Teddy Bears For Evie


We celebrated the 2nd birthday of our youngest grandaughter, Evie, last Thursday night.  As you can tell, she was excited!  When we arrived, she started jumping up and down.  She smiled, sang, and danced all evening.  The best part was watching her face as she opened each gift!


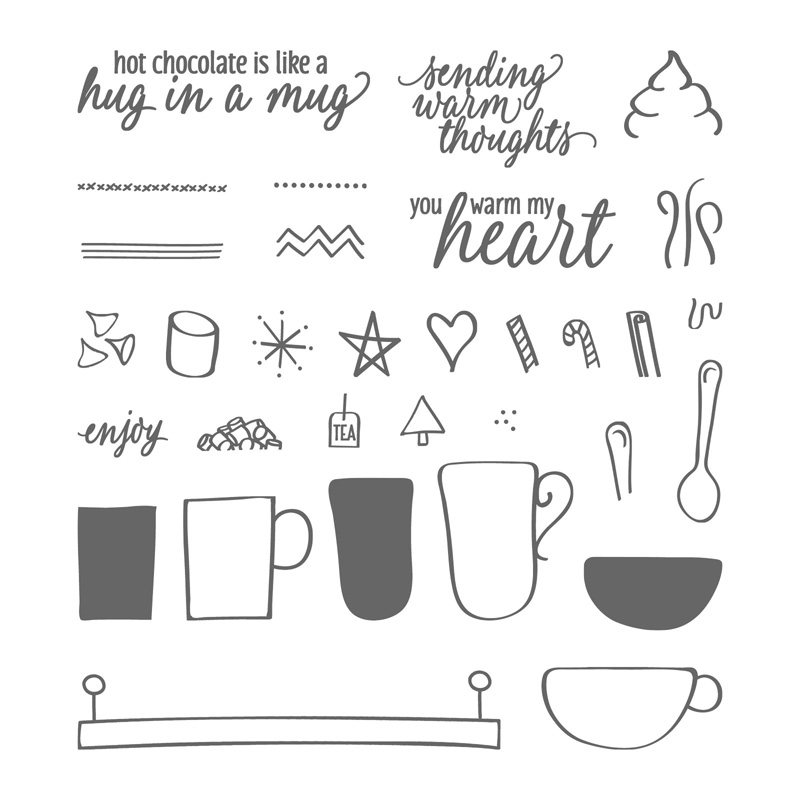
My gift to her was a cute little teddy bear family from Calico Critters and also a board book called Little Fur Family.  I used the Baby Bear stamp set to embellish the gift bag.


The set includes 3 teddy bear images that are made to layer on top of each other.  This creates a very realistic-looking teddy bear!  This was my first time to use this set & I am pleased with the way it turned out.

Image result for Baby Bear stampin up
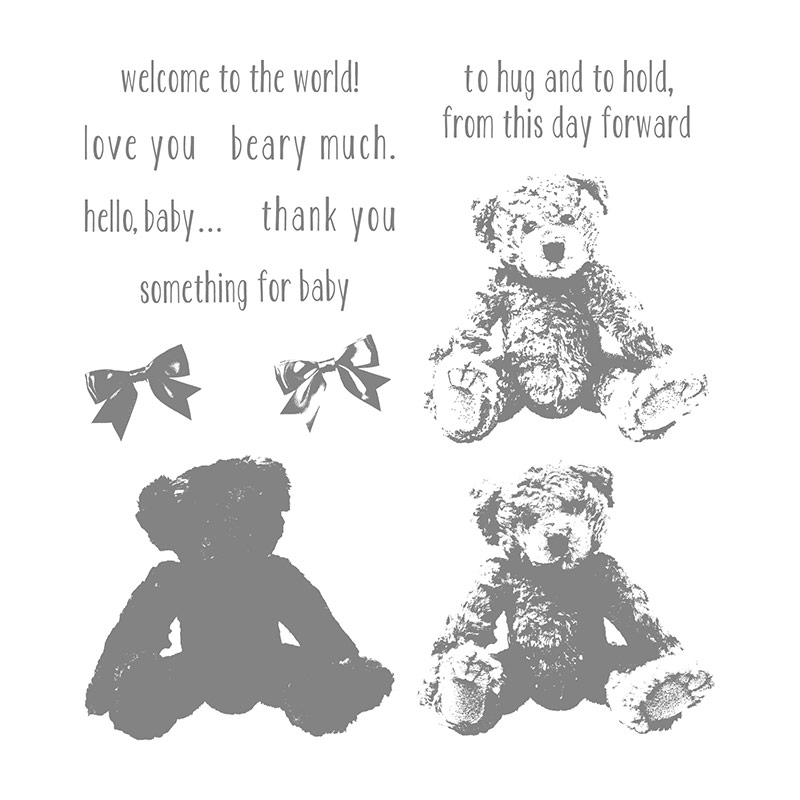
I am looking forward to making more teddy bear cards, which I think will be suitable for several occasions - birthday, Valentines day, thinking-of-you, get well, or just a card to send someone who needs a little comfort.

I made the background of my tag using the Quilt Top embossing folder.  It is from the Holiday Catalog, but it is one of the few items that is being carried over and will still be available for awhile.  This is a quick way to add texture to a project, and the quilt pairs perfectly with the teddy bear.

SIMPLE STAMPING TIP #23 - Use stamps and accessories to make tags to tie onto gift bags.

Thanks for taking a look at this week's blogpost.  I enjoy sharing tips here each Thursday, that hopefully inspire you or give you some new ideas.  The new year will be here soon, bringing many more occasions to celebrate and commemorate.  Stampin' Up has many products to make it easy to do just that; let me know if there is anything you would like to order!


Thursday, December 21, 2017

Card for January


Most of my Christmas preparations are done and I had a little bit of time yesterday afternoon to create my "all-purpose" card for January.  Each month, I make about 8 cards (all alike) to have on hand to send at a moment's notice.  I think this card evokes a nice, cozy feeling of warmth with the quilt & hot beverage!  Who doesn't enjoy those comforts on a cold, winter day?

I used one of my favorite papers that Stampin' Up is currently offering . . . it is called Quilted Christmas and it can be found in the Holiday catalog.  However this catalog expires on Jan 2, 2018, so if you want this paper, you need to order it now!  One thing that I love about this paper is that it is not just for Christmas!  I think the gingham & the stripes could be used any time of year.  And the red/white designs would be perfect to use for Valentines day.  And the rest of the paper you could use next Christmas!  It comes in a pack of 48 6"x6" sheets and is $9.  Here is a look at the other designs:
Image result for quilted christmas stampin up designer series paper

The mug image is from a very old set from Stampin' Up (Espress Yourself, 2002).  


This is Stampin' Up's current "mug" set: 
Image result for hug in a mug stampin up
It's called Hug In A Mug and it's from the Holiday catalog.  If I didn't already have a mug set, I would definitely order this one!  I see a lot of fun possibilities here.  Like the Quilted Christmas paper, it is only available until Jan 2.  It includes 32 photopolymer (clear) stamps and is $17.

The tip that I want to share today is:
SIMPLE STAMPING TIP #22 - Use markers to highlight & personalize your stamped images.

Take another look and my card & see if you can guess the 3 places where I used markers . . . 

1.  I colored in the heart on the mug.
2.  I used markers on the letters for WARM.
(I used the Labeler Alphabet; it is best to use markers on tiny little stamps.)
3.  I wrote out the words "sending" & "thoughts".

I really liked the sentiment "Sending Warm Thoughts", which is found in the Hug In A Mug set, but since I didn't have it, I could easily use my markers to write it.

Stampin' Up's markers are dual-tipped; one is a brush tip for coloring on paper or directly onto stamps & the other end has a fine tip for writing.  There are four sets of markers available from Stampin' Up, from each of our color groups, plus two sets in our "in-colors".
Image result for stampin up write markers
Brights Collection, set of 10, $29

Image result for stampin up write markers
Subtles Collection, set of 10, $29
Related image
Regals Collection, set of 10, $29

Related image
Neutrals Collection, set of 8, $23

Related image
In-Colors 2016-2018, set of 5, $15

Image result for stampin up write markers
In-Colors 2017-1019, set of 5, $15


If you are interested in purchasing a set of markers or any of the other products I've shown you here, please let me know.  Thanks for taking a look at this post and I wish all of you a merry Christmas!


Thursday, December 14, 2017

Childhood Christmas Scrapbook Page


Christmas can be a very nostalgic time, can't it?  Each year as I get out my Christmas decorations and hear Christmas songs, I can't help but remember the Christmases from my childhood.  I have only a FEW photos, but a LOT of memories.  So I put the the photos & memories together and came up with this page for my childhood scrapbook.


Even though I don't have many Christmas photos that were taken during my childhood, I do have several items from that time.  So I grouped those items together and photographed them for my scrapbook page.  I found the catalog image by googling "1970's Sears Wishbooks".  I looked on you-tube for the pictures of the record albums (and also enjoyed listening to some of the songs!).  What a fun trip down "Memory Lane"!

This is the cover of my scrapbook:

 I only occasionally work on this scrapbook.  Usually whenever I'm feeling especially nostalgic.  I have used various things from the cover as decorative elements on each page, such as the denim paper, buttons, lace, and the colors.  To give the book a cohesive, consistant look, I have used the same cardstock for my background pages, I have made all of my title blocks basically the same & all of my journaling is done on strips.  You can see how I incorporated all of this on a few other pages: 


SIMPLE STAMPING TIP #22:  Create a meaningful keepsake scrapbook by gathering photos from your childhood, sorting them into categories, and pairing them with your memories. 

Do you have many photos from your childhood?  Have you put them into an album?  If you would like to begin, and need any help or supplies to get you started, let me hear from you!


Thursday, December 7, 2017

Christmas Scrapbook Pages


This is the page that I made with our photos from last Christmas.  All of these photos make me smile, every time I look at them!  Christmas seems like a "magical" time for children and the photos that we take at Christmas capture that excitement.  Just look at that photo of Lincoln in the photo at the top left side of the page . . . he was absolutely thrilled to get a Bumblebee transformer!

Even if you are not a scrapbooker,  I encourage you to do something with at least your Christmas photos, so that your family members can look at them in years to come.  Last Sunday, Pete took this photo of Caitlin, looking through a  small album of Christmas pictures of when she was a little girl.   I love that Evie is getting a glimpse into her mom's childhood!  This is why I make scrapbook pages!


Making a scrapbook page of your Christmas photos doesn't have to be complicated or time-consuming.  Simply print your best photos, mount them on a page, write a line or two of memories, & add a few embellishments.  The easiest way is using patterned paper.  

SIMPLE STAMPING TIP #5:  Cut "un-necessary" parts out of photos.  Arrange photos on page and fill in empty spaces with patterned paper.


Here are the paper collections that are in the current Stampin' Up catalogs:

Image result for quilted christmas stampin up paper
Quilted Christmas

Image result for merry little christmas stampin up paper
Merry Little Christmas

Image result for merry music stampin up paper
Merry Music

Image result for christmas around the world stampin up paper
Christmas Around The World

Image result for year of cheer stampin up paper
Year of Cheer
Image result for be merry stampin up paper
Be Merry


Any of these papers would look great paired with YOUR photos!  Let me know if you would like to order a pack, so that you can make your own Christmas scrapbook pages.

Thursday, November 30, 2017

Books (and bookmarks) for Christmas


A few days ago, I was shopping for a Christmas book to send to my grandchildren in Oregon.  As soon as I saw this one, I knew it was the perfect one!  

Have you heard of the long-standing tradition in Iceland of giving books on Christmas eve?  Click here for a good article that explains it all.  I can't think of a nicer way to go to bed on Christmas eve!

Books are one of my favorite gifts, both to give or receive.  When I give a book, I often make a simple bookmark to accompany it.  These are quick to make, using the Scalloped Tag Topper punch from Stampin' Up and patterned paper.  (And yet another use for patterned paper!)  Here, I used designs from the Quilted Christmas paper & the Merry Little Christmas paper.


This is a perfect time of year for hand-made crafts . . . take a look through our catalogs for some inspiration!  


Thursday, November 23, 2017

Cards For December (other than Christmas)


One of my favorite things about Christmas is making and sending cards to friends and family.  But even with the holidays, there are still birthday, thank-you, & thinking-of-you cards to send.  I stamped up the cards above using the Quilted Christmas paper from the Holiday Catalog.  What I like best about this paper is that it can be used for occasions OTHER than Christmas.  The colors are bright & cheerful and the patterns convey a sense of warmth & friendliness.  

SIMPLE STAMPING TIP #2 - Stamp a stack of cards to have on hand to send throughout the month.

This paper comes in a stack of 48 6"x6" sheets and sells for $9.00.  There are also coordinating products with this paper, but it is easy to mix and match with many other stamp sets and accessories (like that cat punch!).

Thanks for stopping here today!

Thursday, November 16, 2017

A Black Friday Tradition

 Black Friday, 2009


Today I want to share a tradition that I've enjoyed for several years.  I spend every year on the day after Thanksgiving stamping my Christmas cards.  I enjoy this the most when I can do this with family or friends (I miss you, my Alaska friends!).  This always puts me in a holiday mood and it gets me off to a good start in my preparations for Christmas.  I'm excited this year to have two friends who are new to stamping that will be joining me.


SIMPLE STAMPING TIP #21 - Spend "Black Friday" stamping Christmas cards. 

Here are a few cards, that might inspire you.  I stamped these cards to sell at a Christmas Crafters Market, which is this Saturday.  (At Coldwater High School, 9am-3pm, if you are local)  All of these feature current products from Stampin' Up's Annual & Holiday catalogs.

These first three cards were made using the "Quilted Christmas" designer series paper (Holiday catalog).


I used the Christmas Pines stamp set and the Wood Textures designer series paper (both from the Annual catalog) for these next three cards.


The next couple of cards were made with the Star of Light stamp set (from the Annual catalog).


This last one is my personal favorite.  I used the Hometown Greetings edgelit dies and also the mini tinsel trim (both from the Holiday catalog).

If you need any supplies to get you started, I would be happy to help you!