Thursday, October 26, 2017

Simple Card for November


Autumn was slow in coming to Michigan this year, which I didn't mind at all!  For some reason, I have been reluctant to let go of summer this year.  But, as Genesis 8:22 says . . .

As long as the earth endures,
seedtime and harvest, cold and heat,
summer and winter, day and night
will never cease.

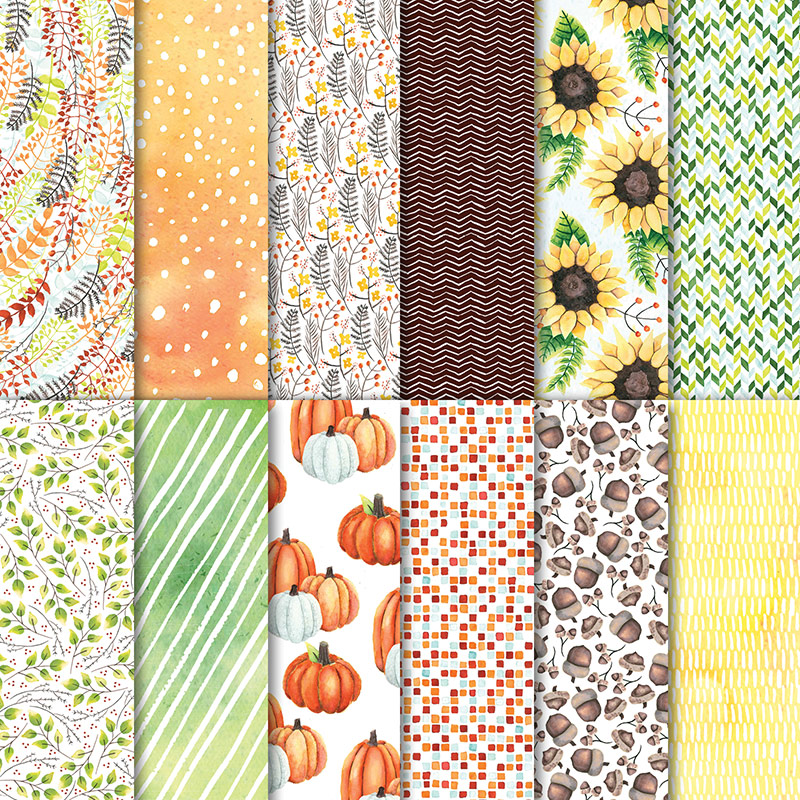
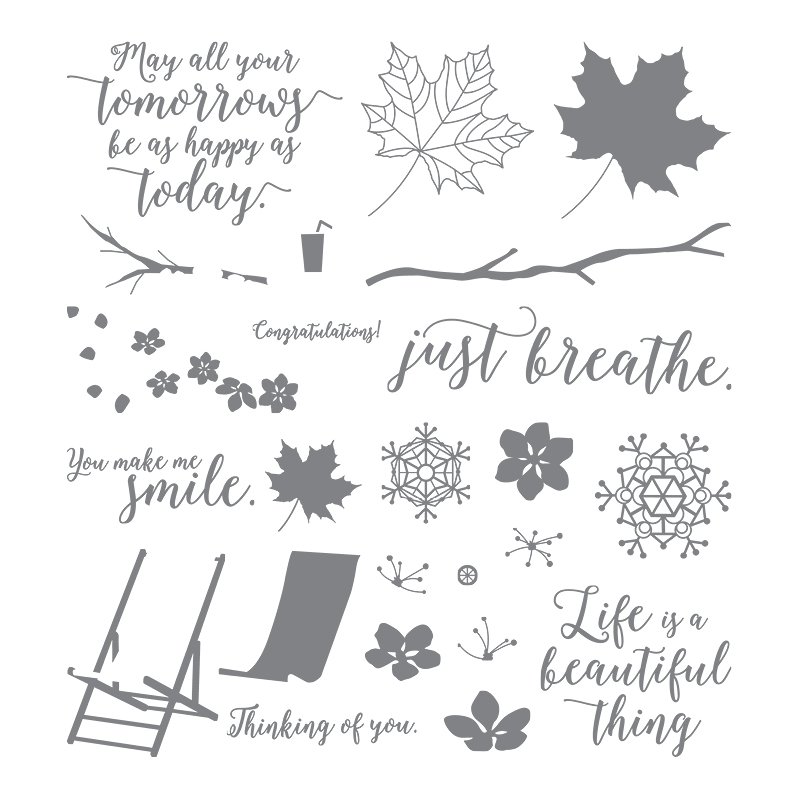
So, whether we like it or not, autumn is upon us.  The paper I used in the card above says "November" to me.  It is from the Painted Autumn collection in Stampin' Up's Holiday catalog.  The leaves, as they are changing colors, look as though they are blowing in the wind. I like how this paper looks against the background of Soft Sky cardstock.  The sentiment is from the Painted Autumn stamp set.  With Thanksgiving coming up later this month, this is a perfect time to express gratitude for someone in your life.  Who are you thankful for?  I'm sure his/her heart would be touched if you expressed your thankfulness for them.

SIMPLE STAMPING TIP #2 - Stamp a stack of cards each month to have ready to send.

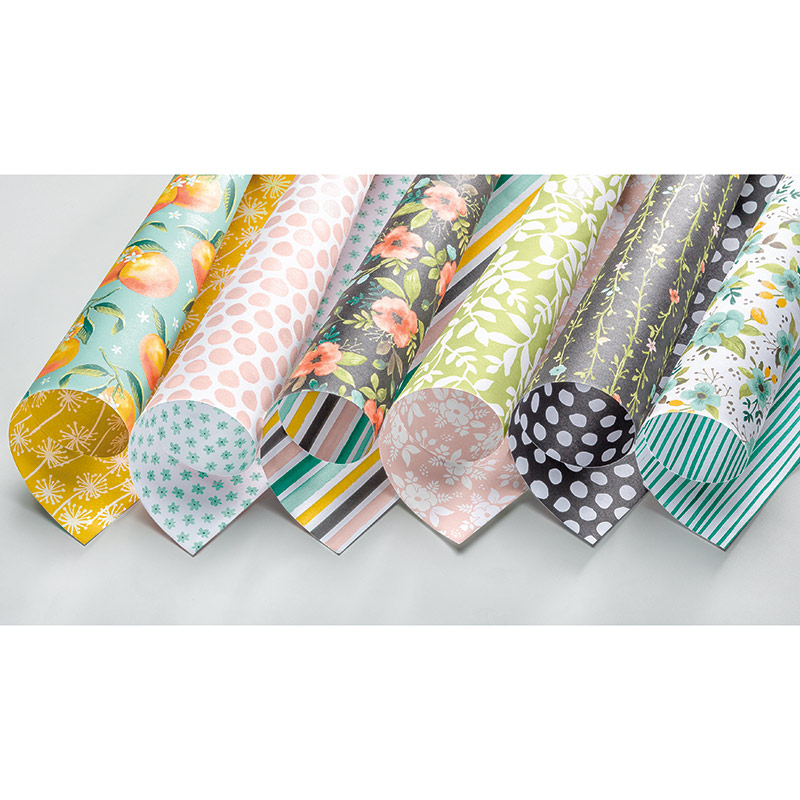
Stampin' Up has been having a sale during the month of October on select collections of patterned paper.  This Painted Autumn paper is one of the ones on sale, as well as many of the other ones I've featured here over the past few months.  (Including the Wood Textures paper, which I consider to be a definite "must have" item for all paper crafters!) The sale is "buy three, get one free."  So if you've been thinking about ordering some paper, now is a good time to do it!  Patterned paper is my absolute favorite item to use in stamping/scrapbooking.  It is an inexpensive way to add instant "pizzazz" to any project.  Click here to see the styles of paper that are included in this sale.  This sale ends on Tuesday, Oct 31.

You can order by following the instructions under the "shop now" button in the sidebar, or by simply sending me an email (godismydelight@yahoo.com).

Thanks for stopping by my blog today!

Thursday, October 19, 2017

Autumn Scrapbook Pages


Pete & I spent Columbus Day at the Creation Museum, just south of Cincinnati Ohio.  We had looked forward to this trip with great anticipation and we were not disappointed!

I made two scrapbook spreads of our day there; one for the outside shots and one for the inside.  The Painted Autumn designer series paper from Stampin' Up was perfect to use on all of the pages.


Image result for painted autumn designer series paper
  

I got a little creative with the title/journaling block.  When I am trying to think of ideas for interesting "decorations" for a page,  I always try to find something in the photos that I can "mimic".  So here I mimicked the zipline!  I used the Labeler Alphabet set and a piece of Solid Baker's Twine (Crushed Curry).  


Also, I added a stamped image of a leaf to the block.  I find that leaf rubber stamps are a perfect accent on pages with outdoor photos.  They complement the photos, without drawing attention away from the photos.  (The photos should be the main focus of your page, not your decorations!)  The leaf that I used is from a retired set, but there are several stamp sets that feature leaves in our current Annual Catalog (Vintage Leaves - p 125, Colorful Seasons - p 147, as well as many of the floral stamp sets). 

The photos on the "indoor page" did not turn out as well as I would have liked because most of the displays were behind glass.  But it was an important part of our visit to the museum, so I wanted to include those anyway. 

The paper from this collection with the little squares reminded me of ancient tiles, so I thought it would work well with these photos.  


I used the Labeler Alphabet set again.  This time I used it for just the first letter on my journaling blocks.  And here is another subtle use of repetition . . . the square shape on the alphabet stamps matches with the squares on the paper.  


Here is a way to add words to paper that has a "busy" design . . . just print them on blocks and cut them out.


So, here is a list of the tips that I used that you might find useful in creating your own scrapbook pages:

SIMPLE STAMPING TIP # 3 - - - Look for elements (colors, accents, etc) in your photos that you can repeat on your page.
(I use this tip on every scrapbook page.)

SIMPLE STAMPING TIP # 17 - - - Use leaf rubber stamps as accents on your outdoor pages.

SIMPLE STAMPING TIP# 18 - - - Use an alphabet stamp to capitalize only the first letter of your journaling.

SIMPLE STAMPING TIP # 19 - - - Print the words of your journaling on a strip of paper and cut them out to use on "busy" background paper.


If you are ever travelling near Cincinnati, I recommend that you stop at the Creation Museum.  There is so much to see and do there.  We were there all day, and still didn't see everything.  Which means that we will be going back for another visit!

Thanks for stopping by my blog today!  All of the products that I mentioned can be found in the catalogs in the right sidebar.  If you have any questions, you can email me at godismydelight@yahoo.com.

Thursday, October 12, 2017

Stamping In Black


I had been stamping cards for several years before I ever thought about using black cardstock.   As soon as I tried it, I liked how classic and clean it looked.  When I was recently stamping cards for Halloween, I decided to make some non-Halloween cards, using black cardstock as the base.  These cards I'm sharing today are the results!

SIMPLE STAMPING TIP #16 - - - Use black cardstock, paired with a black inkpad for a simple, classic look on your cards.


For many of these cards, I used papers from the Whole Lot of Lovely collection. 
Image result for whole lot of lovely stampin up

On the card below & the one above, I stamped my greeting directly onto the paper.  Also, on this "Happy Birthday" card, I used my Wink of Stella glitter brush over the words, to match the black shimmer ribbon.  (The camera doesn't capture the subtle bit of glitter.)


This paper is my favorite one from this collection.


I like how the black cat (punched from the new Cat Punch in the Holiday Catalog) stands out against this background paper.


I love this paper from the Spooky Night paper collection!  


I have lots of black going on in this birthday card that I stamped for my friend Lisa.  I like the contrast of the pink against the black & white.

Another common "thread" in all of these cards, is that I used some sort of black trim in all of them.  The Black Vintage Crochet Trim is in the Holiday Catalog.  The Black Shimmer Ribbon and the Black Solid Baker's Twine can be found in the Annual Catalog.  

As you can see, black isn't just for Halloween!  If you haven't used much black in your stamping, give it a try.

Thursday, October 5, 2017

You Make Me Smile Card


It's that time of year, for all things PUMPKIN!  I couldn't resist putting this "smile" sentiment together with the jack o'lanterns!  

I used the Spooky Night designer series paper for both of these cards.  The images are simple and classic.  Some of them are specific to Halloween, and others could be used any time.


Image result for spooky night designer series paper


I cut out the jack o'lanterns from one of the sheets of paper, which is my "simple stamping tip" for this week.

SIMPLE STAMPING TIP #15 - Cut images out of patterned paper to use as embellishments on your cards.

Once I had them cut out and arranged on my card, I adhered them using dimensional dots to lift them up off of the paper, giving a nice 3-D effect.


I used a couple of things to make this card a bit more special.  One is the black shimmer ribbon.  It has just a touch of sparkle to it!  The other thing I did was use a glitter paint brush.  Unfortunately it doesn't show up at all in the photo.  But I brushed it over the smiles of the jack o'lanterns and also I traced over the letters in "smile".  It's just a subtle bit of glitter, and best of all - NO MESS!  I usually stay away from glitter because of the way it goes everywhere.  But there is no mess at all with the glitter marker.  It goes on & it stays on!

The "you make me smile" is from the Colorful Seasons stamp set. This is a great set to have, just for the sentiments!
Image result for colorful seasons stamp set

All of these items are available to purchase from Stampin' Up.  Links and instructions for ordering are along the right sidebar.  Or feel free to contact me at godismydelight@yahoo.com.  Thanks for stopping by here today!